
Summary
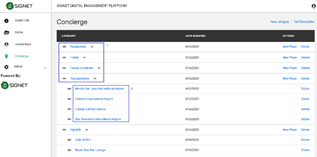
All Concierge data in CE Client App(Figure 3.1-3.2) is adjustable in CE Admin App (Figure 3.3).
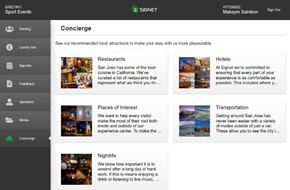
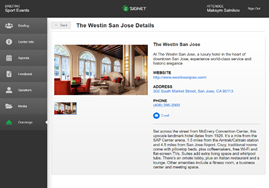
Information on the ‘Concierge’ page is organized in two levels: 1 – Categories and 2- Places on interests.
In order to create a category you should press the button ‘New category’ at the top-right corner of the grid. For creation of place of interest you should press the ‘New Place’ button in the grid. At the beginning when the grid is empty, it needs first to create a list of categories and after that provide places of interest.
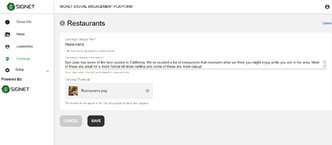
Clicking on the name of category will lead you to the ‘Category’ edit page (Figure 3.4) where you could edit ‘Concierge category title’, ‘Concierge category description’, ‘Concierge thumbnail’.
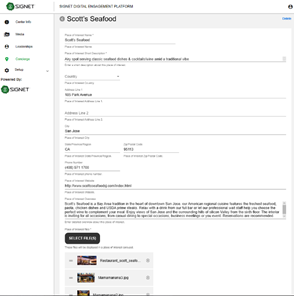
When you click on the name of some sub-category, you will see ‘Place of Interest edit page (Figure 3.5) where you could edit ‘Place of Interest name’, ‘Place of Interest Short Description’, ‘Address’, ‘Place of Interest Web site’, ‘Place of interest overview’, ‘Place of Interest files’. In ‘Place of Interest files’ you can delete existing media files or upload new files which will represent the current place of interest in the form of carousel in CE Client App.
On both edit pages there are some mandatory and optional fields. The button ‘Save’ will be enabled after providing all mandatory fields.
|
Figure 3.1 - Concierge categories in App |
|
Figure 3.2 - Concierge places of interests in App |
|
Figure 3.3 - Concierge page in Admin App |
|
Figure 3.4 - Category edit page |
|
Figure 3.5 – Place of Interest edit page |